Microservices Development
Local Development Craftmanship
NetCoreKit
All .NET microservices are developed by using NetCoreKit library. So we need to make it as a submodule in coolstore-microservices project.
Remove submodule
If you have already added submodules for netcorekit, then you need to remove it first. Let doing following steps to remove it.
At root of coolstore-microservices project, run command below
> rm -Rf src\netcorekit
> rm -rf .git\modules\src
Then open up .git\config file, and delete the section with src\netcorekit.
Refs:
- https://stackoverflow.com/questions/12218420/add-a-submodule-which-cant-be-removed-from-the-index/39189599
- https://stackoverflow.com/questions/43789152/git-removing-submodule-error
Add submodule
Run the command at the root of coolstore-microservices project as following
> git submodule add https://github.com/cloudnative-netcore/netcorekit src/netcorekit
It should create a file .gitmodules with the content as below
[submodule "src/netcorekit"]
	path = src/netcorekit
	url = https://github.com/cloudnative-netcore/netcorekit
	ignore = dirty
Update submodule
To update the content from NetCoreKit project, run
> git submodule foreach git pull origin master
Reference at https://stackoverflow.com/questions/5828324/update-git-submodule-to-latest-commit-on-origin
Notes: we can also check out a branch or a tag at https://stackoverflow.com/questions/1777854/how-can-i-specify-a-branch-tag-when-adding-a-git-submodule
Identity Server
- IdentityServer4
Postman
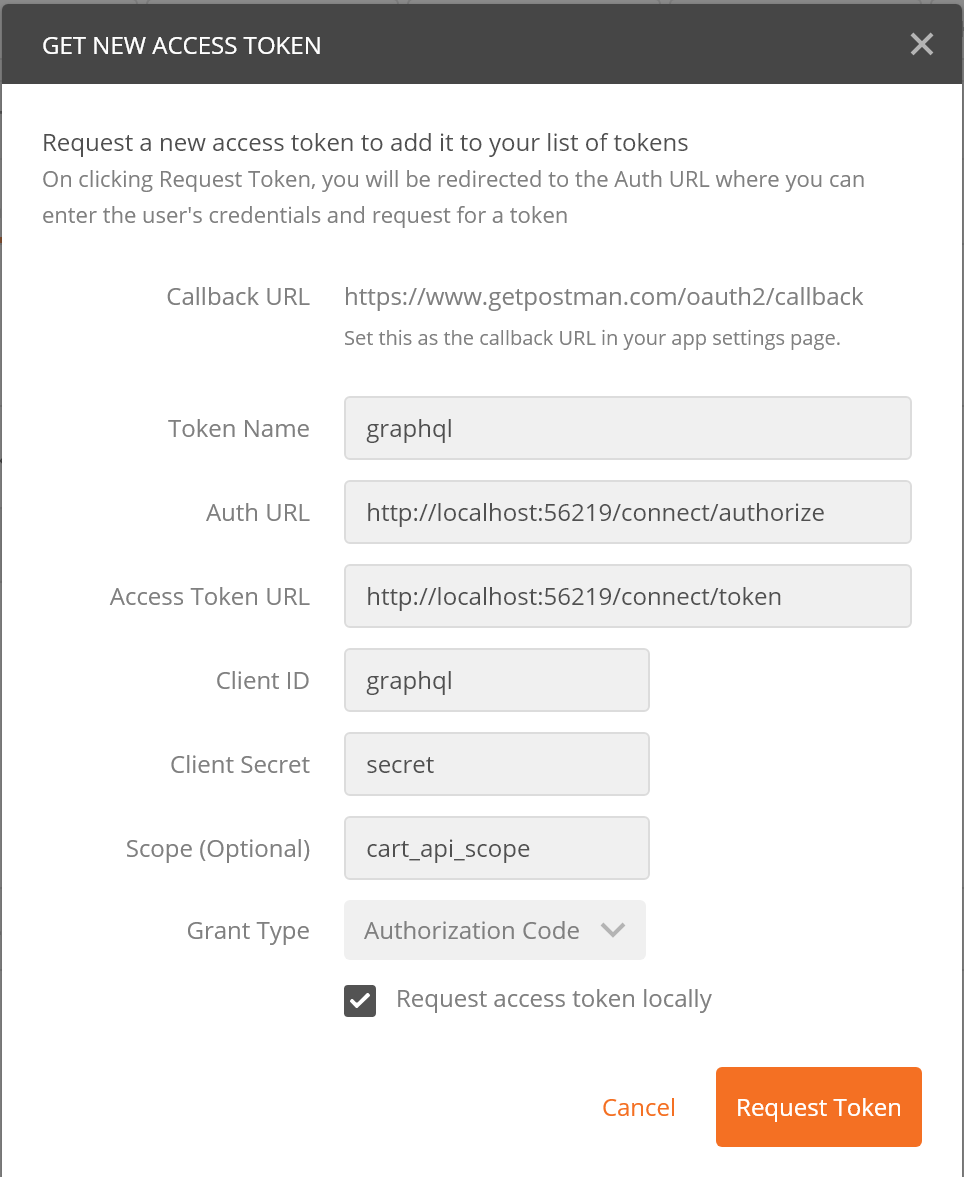
TODO
Open API
TODO
GraphQL Server
TODO
Front and Back Office Websites
TODO
gRPC Service
- Grpc
- Google.Protobuf
- Google.Api.Gax.Grpc
Before you can generate gRPC files for all microservices in this project you need to install some of tool as below
Install protoc-gen-swagger
This will help to generate Open Api file (former is Swagger), and used in ./src/services/open-api service
More information can be found at https://github.com/grpc-ecosystem/grpc-gateway
go get -u github.com/grpc-ecosystem/grpc-gateway/protoc-gen-swagger
At the root of each microservice, we put one bash script with named cmd_gen_proto.sh so that you can generate standalone gRPC files for each service, and if you want to generate gRPC files for all of them, then you can access and run at ./deploys/scripts/gen-protos.sh
Envoy Proxy
- envoy-proxy
TODO
Open Api
- Swashbuckle.AspNetCore.SwaggerUI
TODO
GraphQL Server
- tanka.graphql
- tanka.graphql.server
- GraphQL.Server.Ui.Playground
- GraphQL.Server.Ui.Voyager
TODO
Front and back office websites
Front office website
- vuejs
- webpack
TODO
Back office website
create-react-app
apollo-client
tanka-graphql-client
At the root of
src/backoffice, we create a.envwith content as below
REACT_APP_GRAPHQL_ENDPOINT=http://localhost:5011
REACT_APP_AUTHORITY=http://localhost:56219
REACT_APP_ROOT_URL=http://localhost:3000
REACT_APP_CLIENT_ID=backoffice
This will point to the local graphql endpoint. When we deploy it to production, we will ovewrite it with another configuration
- Then we run
yarn startto start development theback-officeapp
Up and Running with Docker and Docker Compose
Environment variables
To developing in the localhost, we need to add .env file and put it to the root of coolstore-microservices project. The content of it as below
WEB_PORT=8084
BACKOFFICE_PORT=3000

OPENAPI_SVR_PORT=5010
GRAPHQL_SVR_PORT=5011
IDP_SVR_PORT=8085

CATALOG_SVC_PORT=5002
CART_SVC_PORT=5003
INVENTORY_SVC_PORT=5004
RATING_SVC_PORT=5007

MONGODB_PORT=27017
MYSQLDB_PORT=3306

HOST_IP=<localhost ip get from ipconfig>
Protobuf
In each microservices, we also have cmd_gen_proto.sh to use protobuf tools which generates C# target file for .NET microservice project.
Docker
In each microservices, we also have cmd_build_image.sh to build the standalone service and tag it with vndg prefix.
Docker Compose
To make the development easy, we've usually used docker-compose to boost up all microservices and related components. We can make it run or debug the local microservices using this approach
Library and tool:
- Docker Compose
- Envoy Proxy
- Open Api
- Rest and gRPC protocols
We support 4 modes of docker-compose at the moment:
docker-compose.yml: full running with all services, server and web endpointsdocker-compose-graphql.yml: only graphql endpoints with its backoffice appdocker-compose-graphql.headless.yml: only headless graphql endpointsdocker-compose-graphql.dev.yml: only microservices
List of endpoints
Envoy Proxy Endpoints
- Main Uri: http://localhost:8082
- Admin Uri: http://localhost:8081
Web UI Endpoint
- http://localhost:8084
Identity Server Endpoint
- http://localhost:8085
Open Api Endpoint
- http://localhost:8082/oai/
GraphQL Endpoint
- http://localhost:8082/gql/graphiql
- http://localhost:8082/gql/playground
- http://localhost:8082/gql/voyager
Debugging
Let says we want to debug cart-service so we need to do some steps below
Step 1:
Open docker-compose.yml, find the section below, then comment or remove it
cart-service:
  container_name: cart-service
  image: 'vndg/cs-cart-service'
  restart: always
  environment:
    - Features__EfCore__MySqlDb__FQDN=mysqldb:3306
  ports:
    - '5003:5003'
  expose:
    - '5003'
  build:
    context: .
    dockerfile: ./src/services/cart/Dockerfile
Step 2:
Open src/deploys/dockers/envoy-proxy/envoy.yaml file, then change a bit as below
- name: cart_grpc_service
  connect_timeout: 0.25s
  type: static
  lb_policy: round_robin
  http2_protocol_options: {}
  hosts:
    - socket_address:
        address: 192.168.137.1
        port_value: 5006
type should change to static, and address should be your real IP of the laptop you run
Then, on the command prompt type bash, and ./deploys/dockers/envoy-proxy/cmd_build_image.sh
Step 3:
Run docker-compose up
Step 4:
Run your gRPC service in debug mode
Step 5:
Go to http://localhost:8082/oai/swagger/index.html, click to any cart-service endpoints in there
Enjoy your hack!
Up and running manually on Docker for desktop and AKS
Docker for desktop
Step 1
Make sure we have Docker for Desktop running with Kubernetes option enabled. We need to install kubectl, helm and istioctl on the build machine as well.
Step 2
From current console, type bash to enter Linux Subsystem (Ubuntu)
Step 3
Then cd into your root of project
$ ./deploys/scripts/build-images.sh
It should run and package all docker images.
Notes: it normally takes around 20 minutes for the first time
Step 4
Download and install istio-1.1.1 on the box, and unzip it into somewhere, then initialize it with following commands
$ cd <istio-1.1.1 path>
$ kubectl create -f install/kubernetes/helm/helm-service-account.yaml
$ helm init --service-account tiller --upgrade
$ helm install install/kubernetes/helm/istio --name istio --namespace istio-system
More information about installing istio can be found at https://istio.io/docs/setup/kubernetes/helm-install
Step 5
Apply istioctl command to coolstore chart (please create k8s folder in folder deploys)
$ helm template deploys/charts/coolstore -f deploys/charts/coolstore/values.dev.yaml > deploys/out/coolstore.local.yaml
$ istioctl kube-inject -f deploys/out/coolstore.local.yaml | kubectl apply -f -
Step 6
Add hosts file with following content
127.0.0.1 api.coolstore.local
127.0.0.1 id.coolstore.local
127.0.0.1 coolstore.local
127.0.0.1 backoffice.coolstore.local
Waiting for the container provision completed
Step 7
Install coolstore-istio chart
$ helm install deploys\charts\coolstore-istio --name coolstore-istio
Step 8
Install envoy-proxy stuffs for routing directly from Rest to internal gRPC services
$ kubectl apply -f deploys\k8s\istio-sidecar-injector.yaml
$ kubectl apply -f deploys\k8s\envoy-filter.yaml
Step 9
Access to following URLs
$ curl -I http://coolstore.local # website
$ curl -I http://backoffice.coolstore.local # backoffice website
$ curl -I http://api.coolstore.local # api gateway
$ curl -I http://id.coolstore.local # identity provider
Step 10
Clean up coolstore chart as
$ kubectl delete -f deployment/istio/coolstore.local.yaml
$ helm delete coolstore-istio --purge
$ helm delete istio --purge
Notes:
Global path: set
PATHfordocker,kubectl,helm, andistioctl.Run with Nginx (not recommendation): if you want to run just only
Kubernetes+nginx-ingressgo todeploys/charts/coolstore/values.yaml, and modify as followingnginx: enabled: trueThen run the
helmcommand as$ helm install --name cs-nginx stable/nginx-ingress
Azure Kubernetes Service (AKS)
Step 1: Install Docker for Windows and enable Kubernetes, Ubuntu WSL, kubectl, istioctl, helm and az
Step 2: Create coolstore AKS, enabled RBAC. Minimum should have 3 nodes (istio pilot needs it)
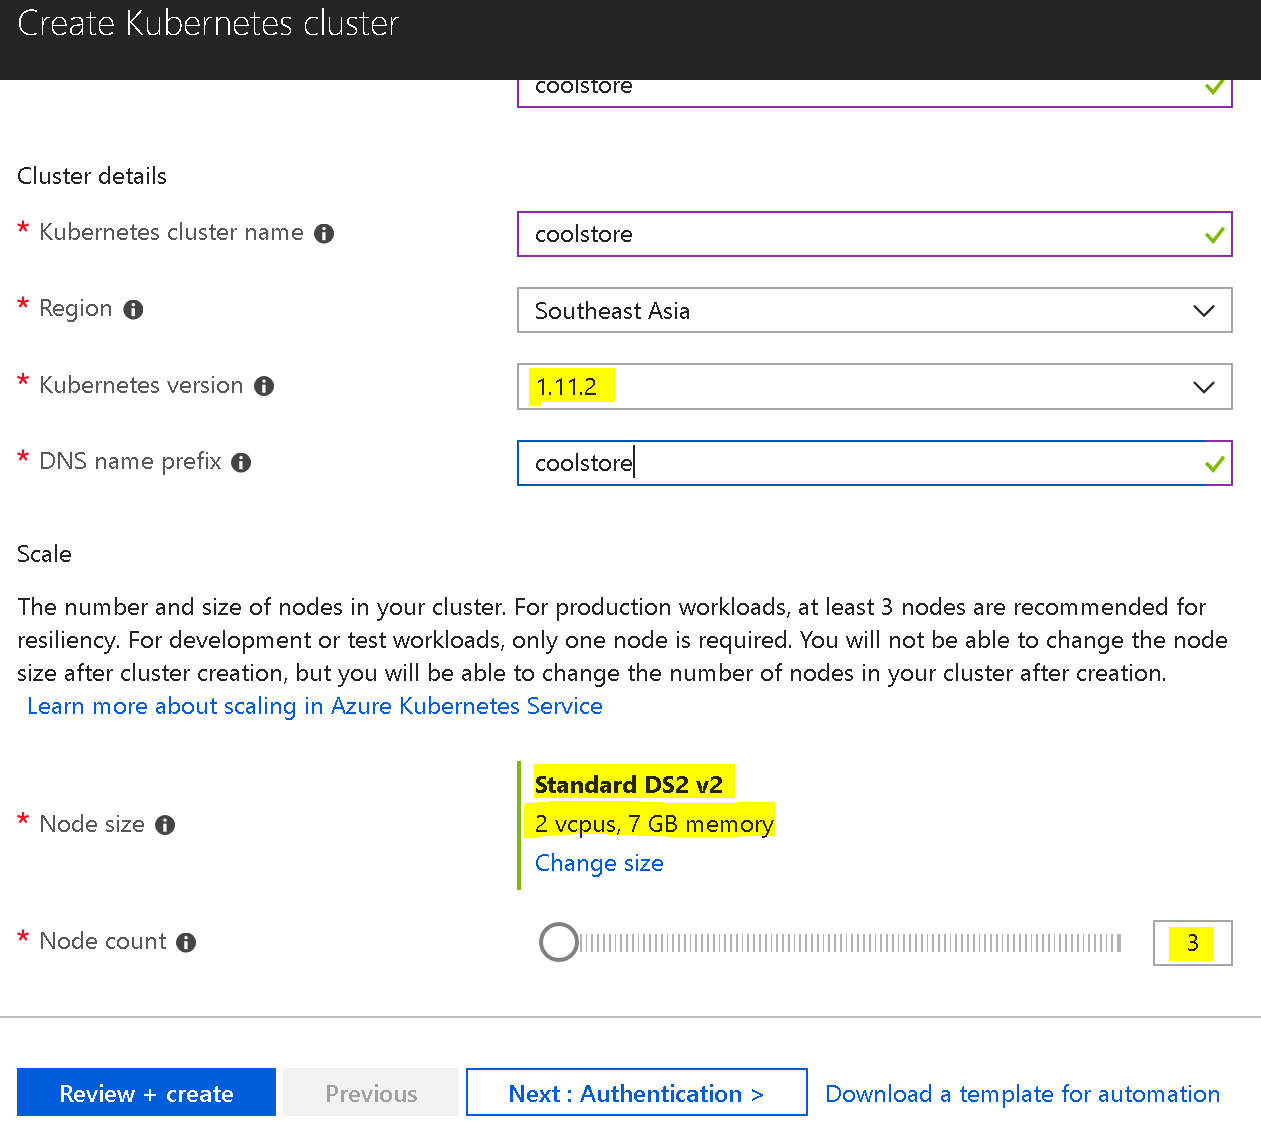
And make sure checking to enable RBAC as following
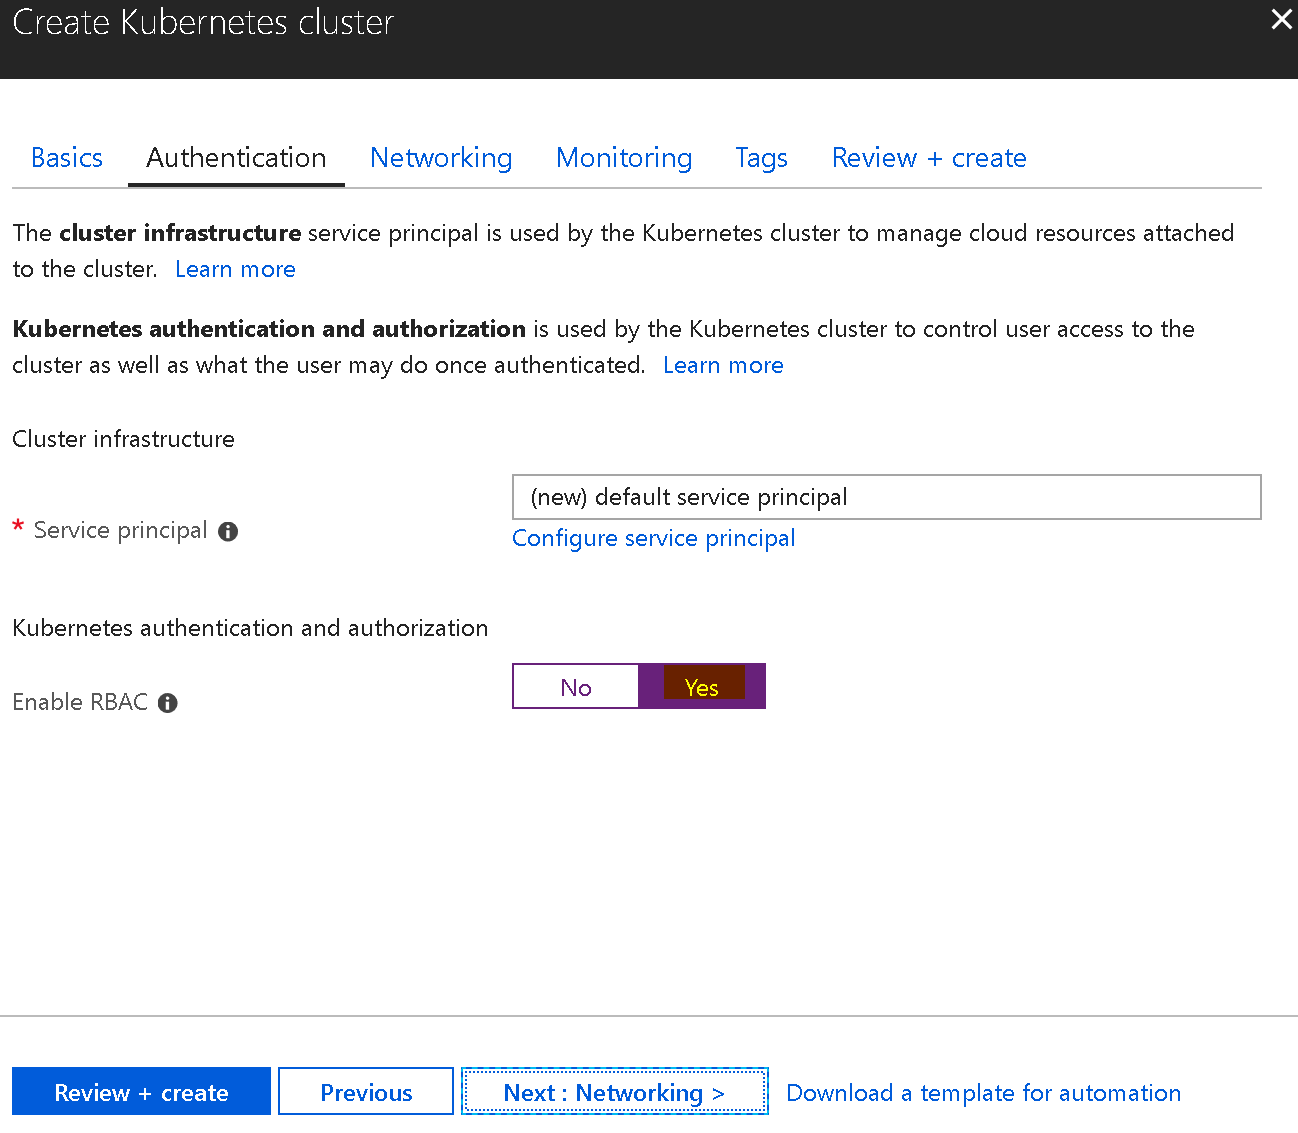
Follow up with next steps to finish creating the cluster. It normally takes around 20 to 30 minutes.
After it finished, we should be able to access to the Kubernetes Dashboard with following steps
$ az aks get-credentials --resource-group coolstore --name coolstore
$ kubectl proxy
But now, you will not be able to access to Kubernetes Dashboard. Then we need to add several steps then
$ kubectl create clusterrolebinding kubernetes-dashboard -n kube-system --clusterrole=cluster-admin --serviceaccount=kube-system:kubernetes-dashboard
Get the token subsequently
$ kubectl get secret \$(kubectl get serviceaccount kubernetes-dashboard -n kube-system -o jsonpath="{.secrets[0].name}") -n kube-system -o jsonpath="{.data.token}" | base64 --decode
Paste the token to login page as http://localhost:8001/api/v1/namespaces/kube-system/services/kubernetes-dashboard/proxy/#!/login
Step 3: Install Istio on AKS
Due to some of the timeout issues for helm at now so that I couldn’t use helm to install, but export it to yaml file, then using kubectl to create it on AKS. Download istio 1.0.0, then upzip to somewhere on the machine. Following command to export and deploy it to AKS
$ helm template install/kubernetes/helm/istio --namespace istio-system > istio-dump.yaml
$ kubectl create -f istio-dump.yaml
$ kubectl create -f istio-dump.yaml
Step 4: Install Coolstore on AKS
Get the internal istio-ingress IP by using
$ kubectl get services istio-ingressgateway -n istio-system -o=jsonpath={.spec.clusterIP}
Create the values.aks.yaml with content like
gateway: ip: 10.0.106.82
Then run helm command
$ helm template deploys/charts/coolstore -f deploys/charts/coolstore/values.aks.yaml > deploys/k8s/dev-all-in-one.aks.yaml
Finally, we inject sidecar with this command
$ istioctl kube-inject -f deploys/k8s/dev-all-in-one.aks.yaml | kubectl apply -f -
Step 5: Put mapping for hosts file
Get external IP on istio ingress by using
$ kubectl get svc -n istio-system
It should print out something like
...
istio-ingressgateway LoadBalancer 10.106.52.19 localhost 80:31380/TCP,443:31390/TCP,31400:31400/TCP,15011:32131/TCP,8060:30958/TCP,15030:31983/TCP,15031:30365/TCP 8d
...
Then, we only need to copy 10.106.52.19 to C:\Windows\System32\drivers\etc\hosts file as following
10.106.52.19 id.coolstore.aks
10.106.52.19 api.coolstore.aks
10.106.52.19 coolstore.aks
10.106.52.19 backoffice.coolstore.aks
From now on, we can access website at http://coolstore.aks, backoffice website at http://backoffice.coolstore.aks, identity provider at http://id.coolstore.aks, and api gateway at http://api.coolstore.aks
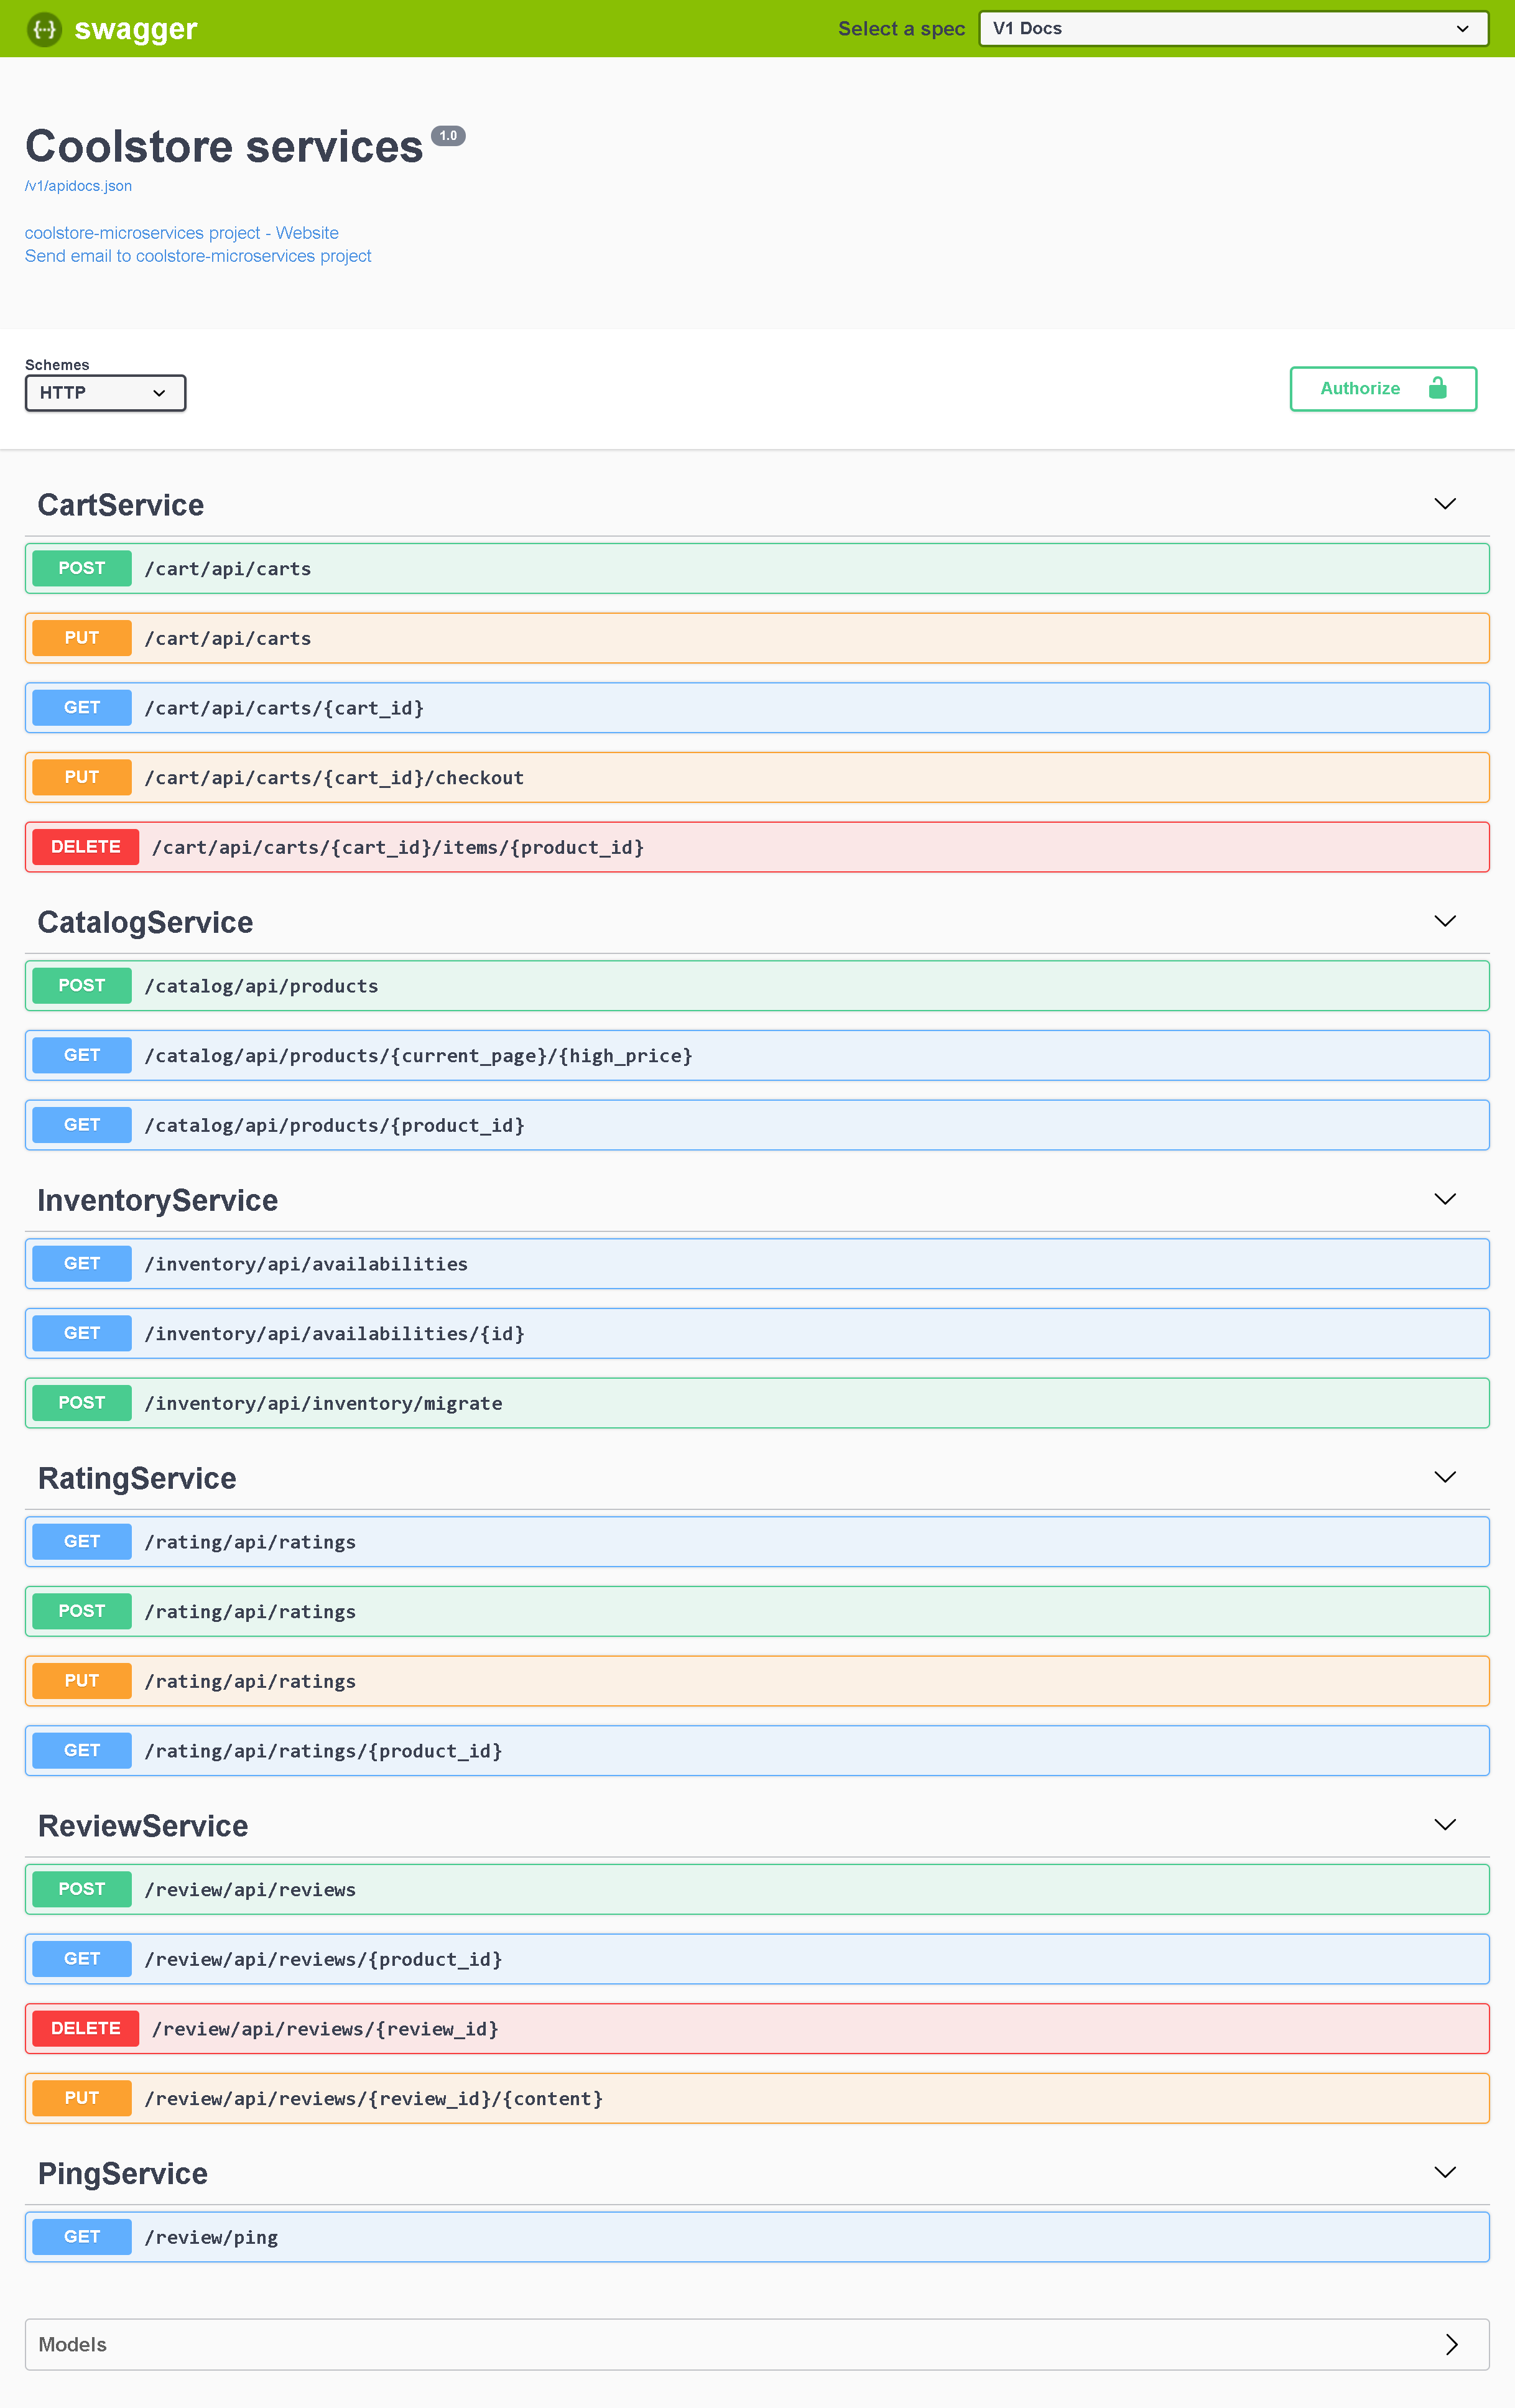
Let say we access to http://api.coolstore.aks/oai/swagger/index.html, then we should see
More information at https://hackernoon.com/5-steps-to-bring-coolstores-service-mesh-to-azure-kubernetes-service-aks-9cd1a5aa008a
Up and Running with Kubernetes and Istio
Kubernetes
TODO
Istio
TODO
Logging and Monitoring
TODO
CI/CD
TODO